When and How to Replace Carbide Inserts in Your Planer or Jointer Cutterhead
Carbide inserts in cutterheads have transformed woodworking by offering cleaner cuts, reducing tear-out, and extending tool life. Found in planers, jointers, moulders, and CNC machines, these durable inserts are essential for smooth, high-quality cuts.
However, even premium carbide inserts will wear down over time. It's important to know how to inspect and replace them to maintain optimal performance and avoid damage to the machine and wood.
Why Sheartak Cutterhead Use Premium Carbide Inserts?
Unlike steel, carbide inserts stay sharp longer, thanks to their hardness, heat tolerance, and wear resistance. They're perfect for high-speed cutting, especially in abrasive materials like hardwoods and resins. With reversible, indexable edges, these inserts are easy to replace, making them cost-effective and time-saving for professionals.
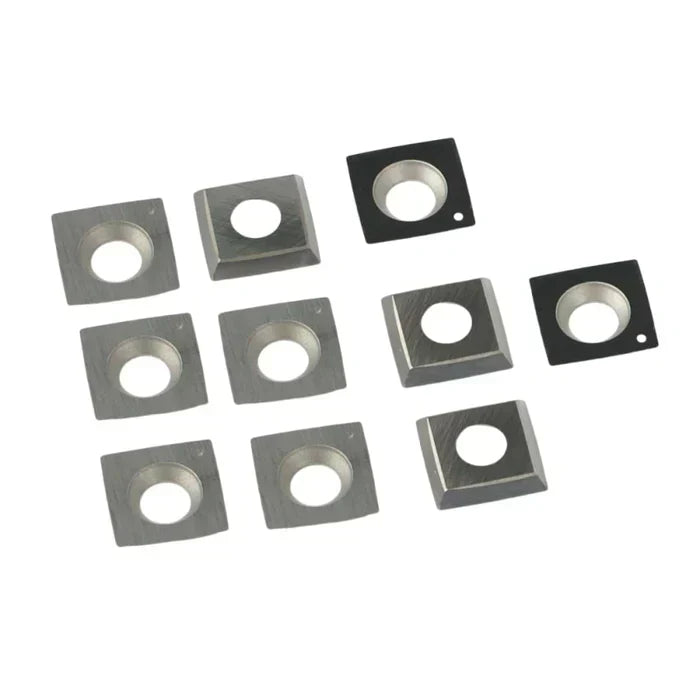
Our cutterhead inserts are small, usually square or rectangular, tungsten carbide blades mounted in rows along a cylindrical cutterhead. Unlike traditional straight knives, these inserts are:
- Reversible with 4 cutting edges
- Precision-ground for flatness and sharpness
- Indexable, so they can be rotated rather than resharpened
These features make insert cutterheads popular in high-end woodworking shops and production environments.
When to Replace or Rotate Cutterhead Inserts
Over time, carbide inserts dull due to the abrasion of wood, resins, knots, and even grit. Look for these signs that it’s time to rotate or replace the inserts:
- Tear-out and rough surfaces: If you notice tear-out, rough patches, fuzzy grain, or inconsistent ridges on the wood surface after machining, it's a clear sign that the inserts have dulled and are no longer cutting cleanly.
-
Burn marks and heat: Dark burn marks or a hot surface immediately after planing or jointing indicate that the inserts are generating friction instead of slicing cleanly, meaning they should be rotated or replaced.
- Visible damage: If the insert edges appear rounded, chipped, cracked, or discolored, it's time to rotate them to a fresh edge or replace them entirely.
-
Harder feeding and motor strain: If feeding material through the machine feels tougher, or if the motor begins to bog down under normal workloads, the inserts may be too dull, causing the machine to work harder than it should.
-
Increased noise or vibration: Louder cutting noise or unusual vibration often points to uneven or worn inserts that are no longer engaging the wood smoothly.
Most inserts are designed with multiple cutting edges. Once one edge wears out, you can simply rotate the insert 90° to expose a fresh, sharp edge — restoring cutting performance without replacing the insert.

How to Replace or Rotate Carbide Inserts: Step-by-Step
Follow these simple steps for replacing or rotating your cutterhead inserts:
- Unplug or lock out the machine. Safety first — cutterheads are dangerous even when stationary.
- Remove dust and debris. Clean the area to avoid contamination when reinstalling.
- Use the correct Torx or hex wrench to remove the screw holding each insert.
- Rotate the insert to the next sharp edge or replace it entirely if all edges are used or damaged.
- Clean both the insert seat and the underside of the cutter. Dust or resin buildup behind the cutting face can cause the insert to sit at a slight angle, leading to uneven cutting or lines on the planed surface. Make sure both surfaces are clean for proper seating.
- Reinstall and torque the screw carefully. Do not overtighten — overtightening can crack the insert or damage the head.
- Repeat across all rows to maintain balance and cutting consistency.
Pro Tips for Cutterhead Insert Maintenance
- Apply a tiny dab of anti-seize or light oil on the insert screw to prevent galling.
- Rotate inserts in a pattern (e.g., mark each side with a dot or number) to track usage and ensure all edges get used evenly.
- Clean the cutterhead periodically to remove pitch, sap, and resin that can lead to overheating or uneven wear.
- Keep spare inserts on hand so you can replace chipped ones without interrupting work.
Conclusion
Maintaining your cutterhead's carbide inserts ensures smooth cuts and extends the life of your machine. Whether you're a professional woodworker or a hobbyist, knowing how to identify dull inserts and replace them effectively will keep your projects on track.
Check Out Our Full Collection HERE!
Or explore our Most Popular Inserts below:
- Carbide Inserts for Spiral Heads 15x15x2.5mm R150
- 14.3x14.3x2mm 2-Cutting-Edge (ICK) for Shinmax/Steel City Accu-Head
- 15x15x2.5mm Carbide Inserts with 4 Straight Cutting Edges
-
15X15X2.5mm R100 Carbide Insert for Byrd Shelix Heads
Photos:


Leave a comment